The opportunity recently arose for a friend to buy a Europa. Whilst this is the particular type he was after, his budget does not allow for the purchase of an airworthy example in the current market.
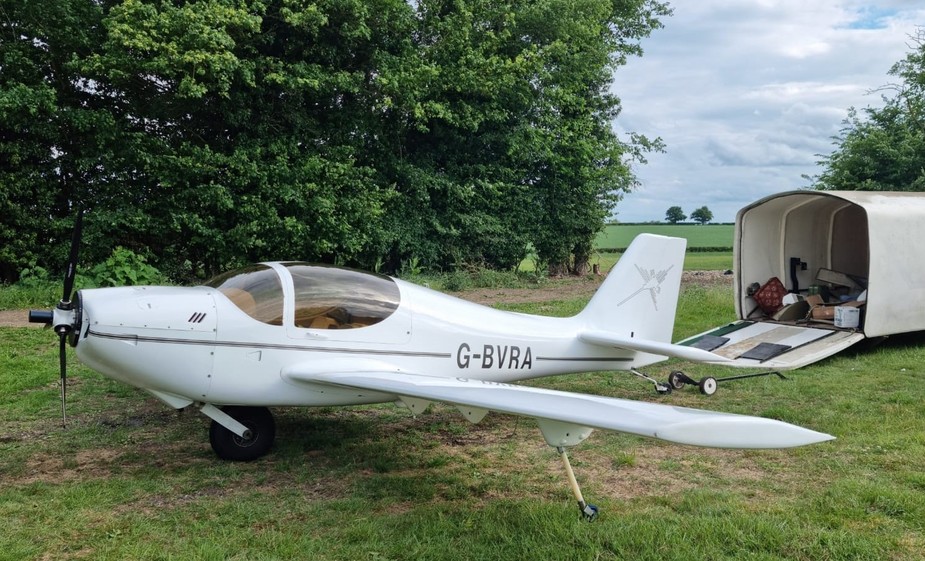
Fortunately, after a short wait, a seemingly ideal example appeared within his budget. The aircraft in question was a monowheel Europa Classic (original version with the foam wings, instead of the moulded wings of the later XS) with an 80hp engine that last had a permit issued in 2018.
The seller knew little about the plane – it apparently belonged to someone else and was being sold on their behalf. The owner bought the plane in 2019, airworthy, and decided he did not like the blue carpeted interior so started to rip it out, then gave up. It sat in the hangar for 3 years before being listed for sale.
Despite the plane not being mine, or for me, I’ve been looking for a light recommissioning project so I offered to help my friend with the purchase and required work to get the plane back in the air.
Some more digging brought up some more of the airframe’s history. It first flew in 2000 and the owner sold it after flying one hour. This was quite common for early Europas as the Monowheel variants can be tricky on the ground and they didn’t meet the originally advertised performance specs. The second owner had it for 16 years and flew it for 1100 hours, and following a long phone call with him I was happy that the aircraft was a good one to work with as it had basically not been flown since he sold it.
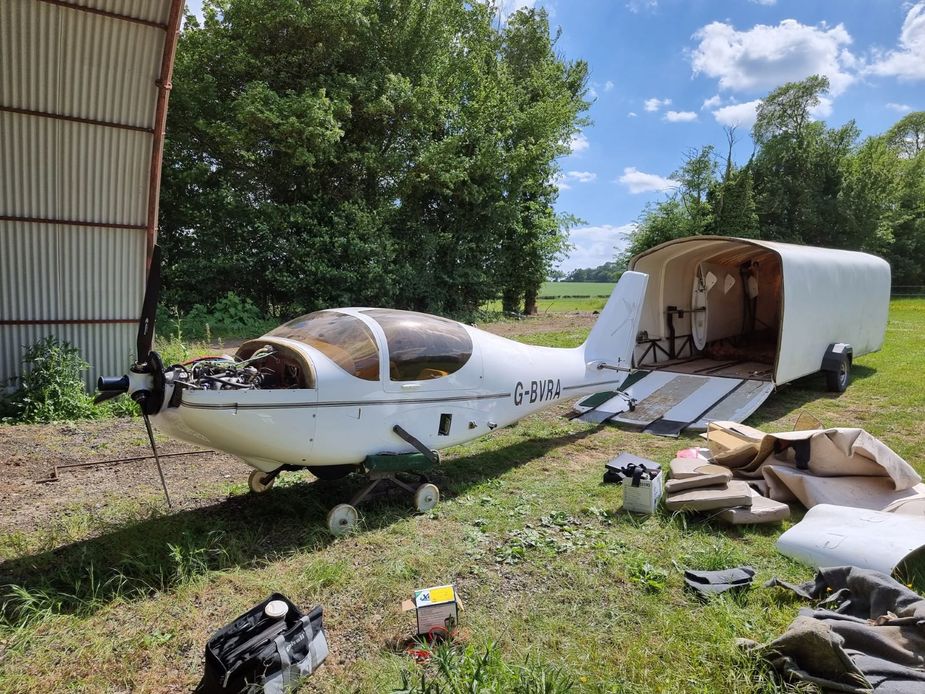
The plane was then purchased and was delivered in its trailer the following week. It was exciting but nerve-wracking to see what would actually show up…
Fortunately, everything was in good order and this was actually excellent value. The trailer contained rigging aids and mounts for all the parts which would have taken considerable time to make. A look through the paperwork revealed that the gearbox had been rebuilt just before its last sale, so it has done only a couple of hours since. The plane also came fitted with an Airmaster constant speed prop, which had been fully overhauled along with the control unit again just prior to the previous sale, so this was a major win. The purchase price could be quite easily attained by parting the plane out and selling the trailer, should there be any major issues with the airframe.
Included also were various spares and a complete new interior kit from Europa.
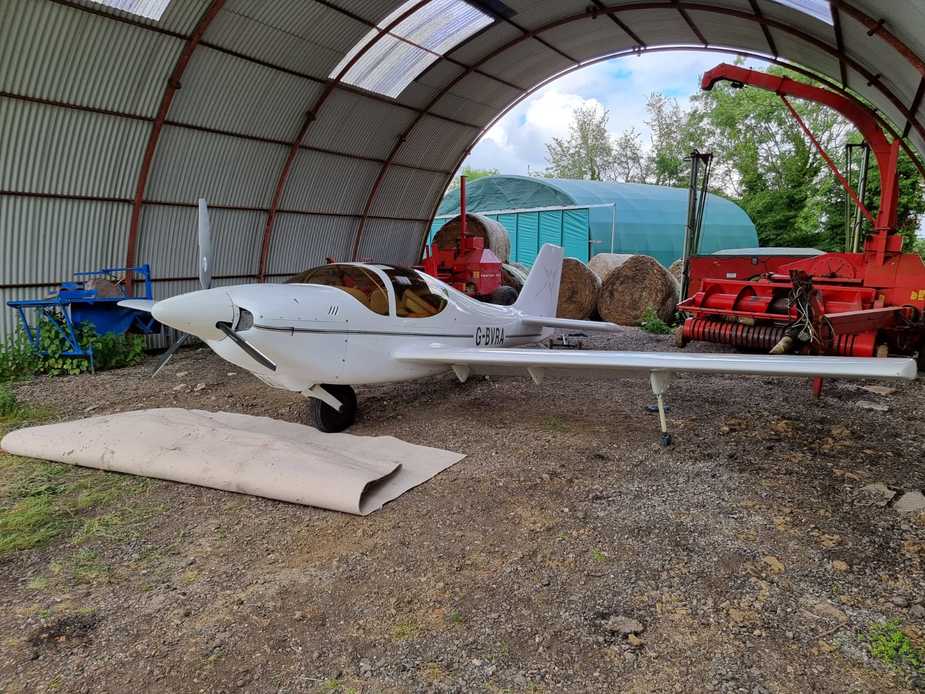
Despite a thick layer of dust, everything looked good once we took it out of the trailer
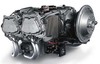
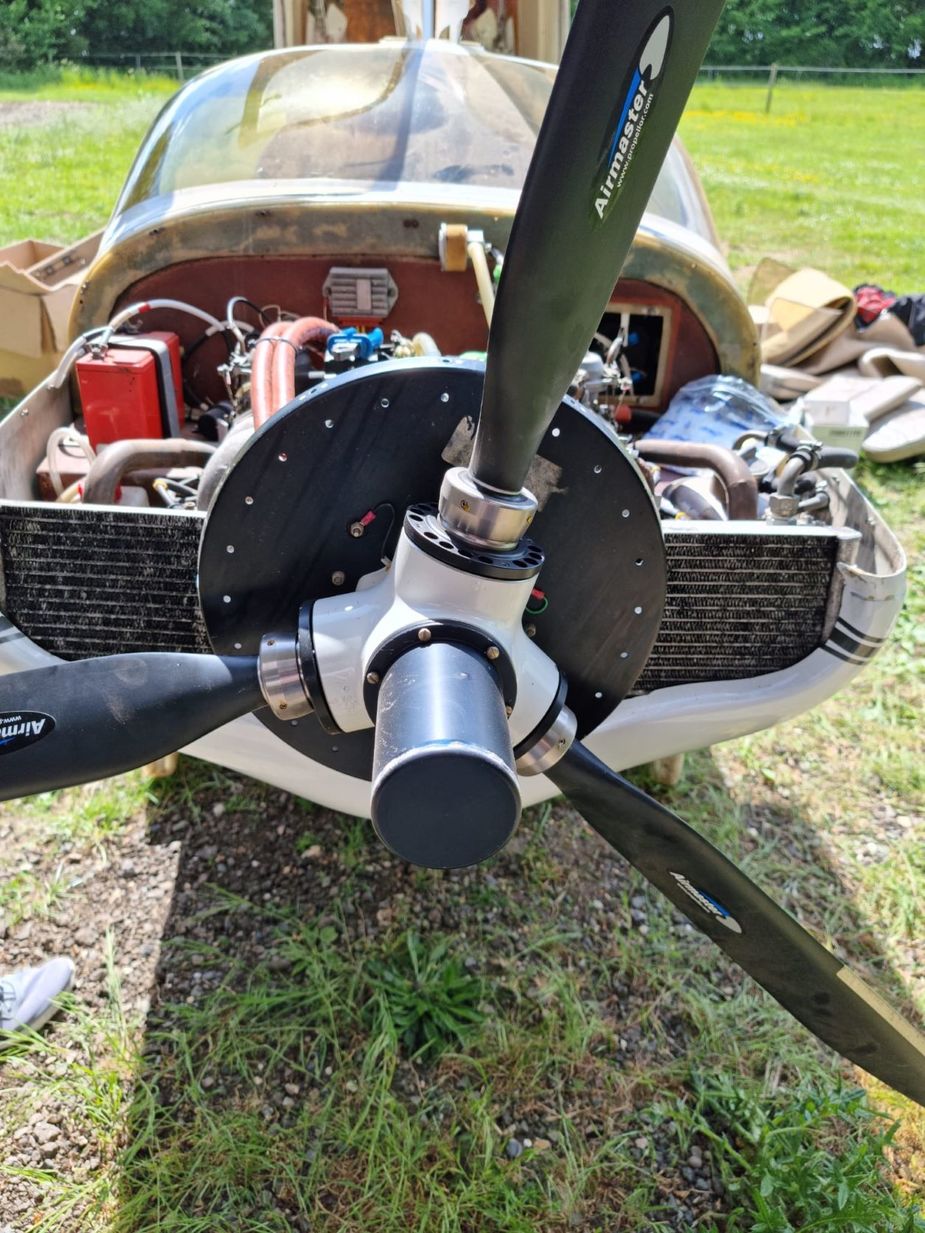
Brand new prop!
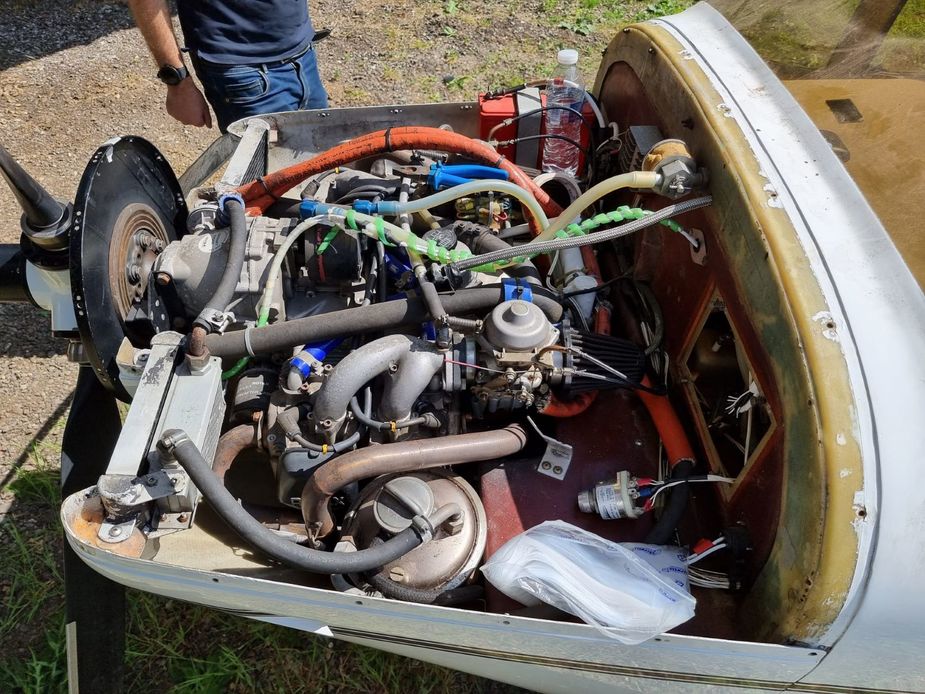
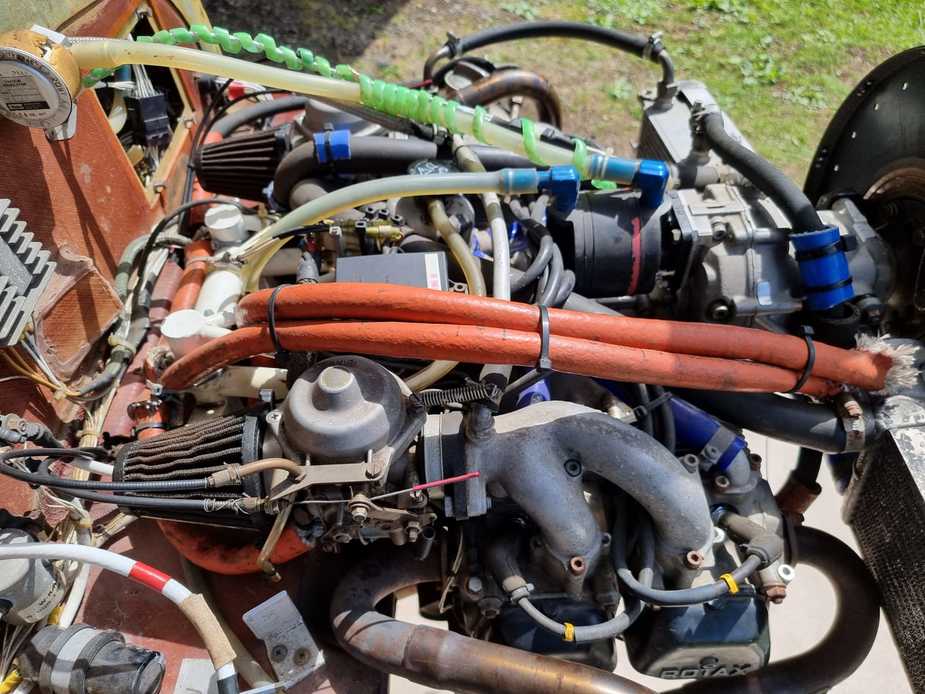
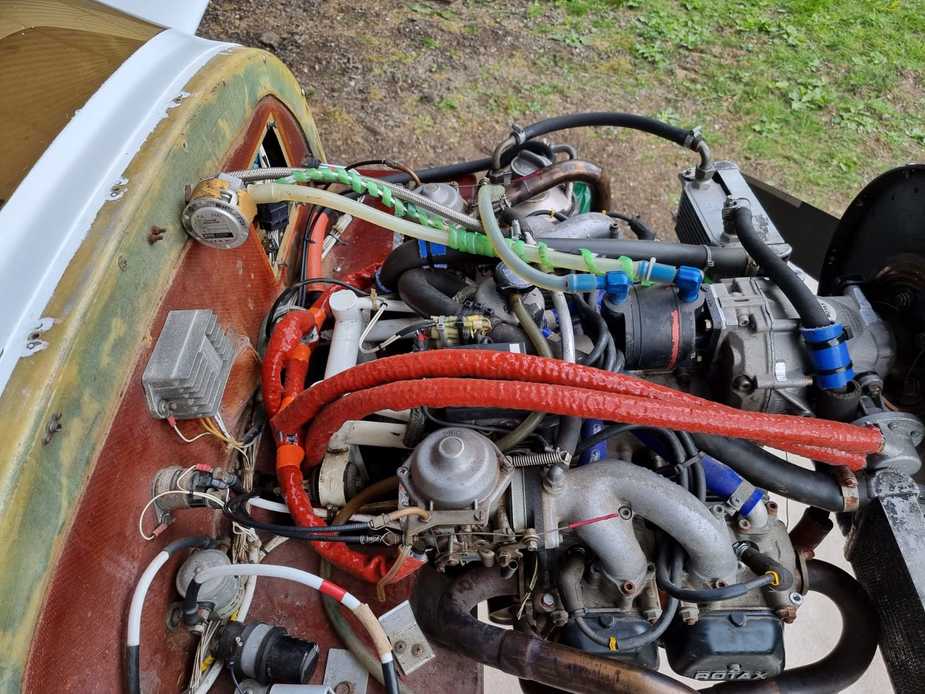
Engine bay was a bit untidy but generally OK. None of the hoses were perished but will all be replaced and everything neatened up.
Interior was hurriedly torn out and then left as is. The panel was not bolted in. Luckily everything was present except for the ignition key. Avionics were an 8.33 Trig radio (another win!), an old Mode C transponder, a Garmin 295 (basically useless now, but working) and a standard 6 pack with vacuum AI and DI.
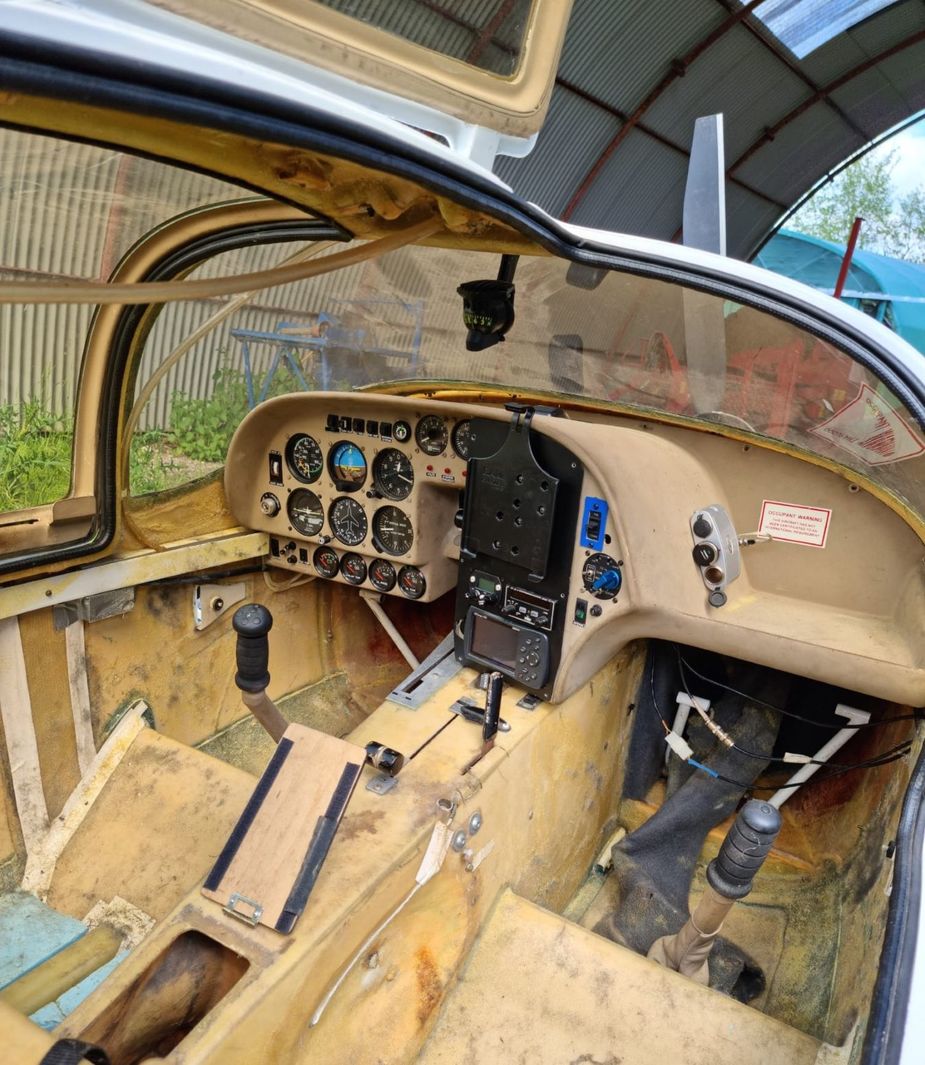
One of the decisions was whether or not to update avionics. All of the wiring has been completed to a high standard with PTFE insulated cable, and more importantly everything works. There is no need to modify the current panel for VFR and this will only delay the project, so we’ve taken the decision to leave it as is for the time being.
In the future, the plan will be to fit Mode S, remove the vacuum system and install a digital AI and HSI.
With the shiny bits out the way, next we looked through the logs and this was all good news. All of the mandatory mods up until the last permit in 2018 have been carried out, and we discovered the recent gearbox rebuild and prop overhaul.
Next we rigged the plane in order to check everything over.
This was also good news as everything went together well and the parts were in good condition. The wings on the Europa Classic are a foam core with a wet fibreglass layup. They are therefore quite susceptible to damage and delamination, and all the surfaces seem to be in good order so clearly the plane has been kept hangared. The trailing edges are all straight, which is good for a plane of this age as I’ve seen warping even on much newer Europa builds.
The wings do however have some blistering, but this is in the top layer of filler and paint rather than the glass so it’s cosmetic only. Given the price however, all very good so far.
A thorough inspection of the controls showed minimal play, but it looks like nothing has been greased in quite a few years, so we are going to have to dismantle all of the control runs and inspect them for wear before greasing them.
The plane came with a dolly so we were able to do a gear swing, and this went well. However, the gear components have not seen fresh grease in some years so this will need dismantling and regreasing.
More to follow…
That’s brilliant. A really good find. There was an inspiring write up in Pilot Magazine when they were launched, I will see if I can scan it. There would be a lot of LAA level expertise on the type available, I imagine, as they are around quite a while. The same issues crop up on each homebuilt type, so someone with lots of maintenance experience on the type will be a good contact. In a time of high fuel prices, something with an 80hp Rotax that has good performance is a good move.
She will be a lovely example when we are finished with her!
Welcome to the family, IO390,
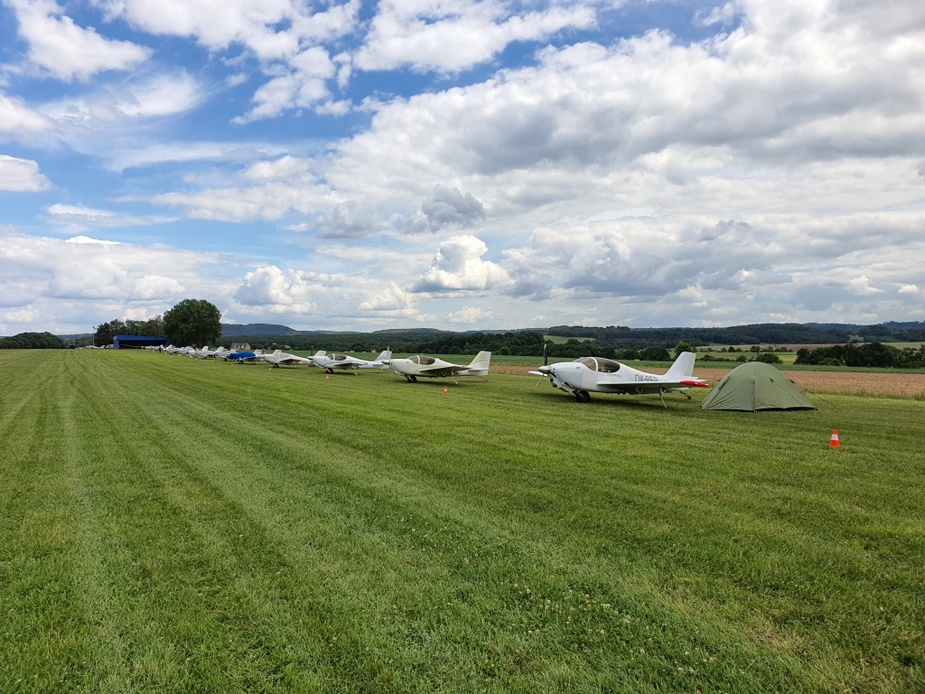
and greetings from the last weekend’s Grand Europa Fly-In at Useldange ELUS, Luxembourg. Twenty eight Europas arrived.
WilliamF wrote:
There would be a lot of LAA level expertise on the type available, I imagine, as they are around quite a while. The same issues crop up on each homebuilt type, so someone with lots of maintenance experience on the type will be a good contact.
One of the benefits of the Europa type is the Europa Club which is quite active, and their website has loads of useful info. I’m a member and I’m also in their whatsapp group which is great also. We have plenty of help on hand too, I know enough about the Europa and general maintenance to carry out most of the work but there’s a lot of type specific stuff that will require a look over by a specialist. That’s planned for this weekend…
Following on from the above, the next job was to inspect the engine and see how it runs. Before cleaning the engine I inspected for leaks, and found one near the bottom of the gearbox. This was narrowed down to the inlet pipe on the oil pump housing. Two issues here: the jubilee clip was completely knackered and wasn’t properly compressing the hose, and there seemed to be a leak past the threads on the fitting. A look at the manual confirmed that the correct tapered pipe thread fitting was installed, and no gasket should be used. I removed the fitting, cleaned everything and since no cracks were present in the housing (a risk especially with a tapered thread fitting) I reinstalled it with some suitable thread sealant. New hose clip and volia.
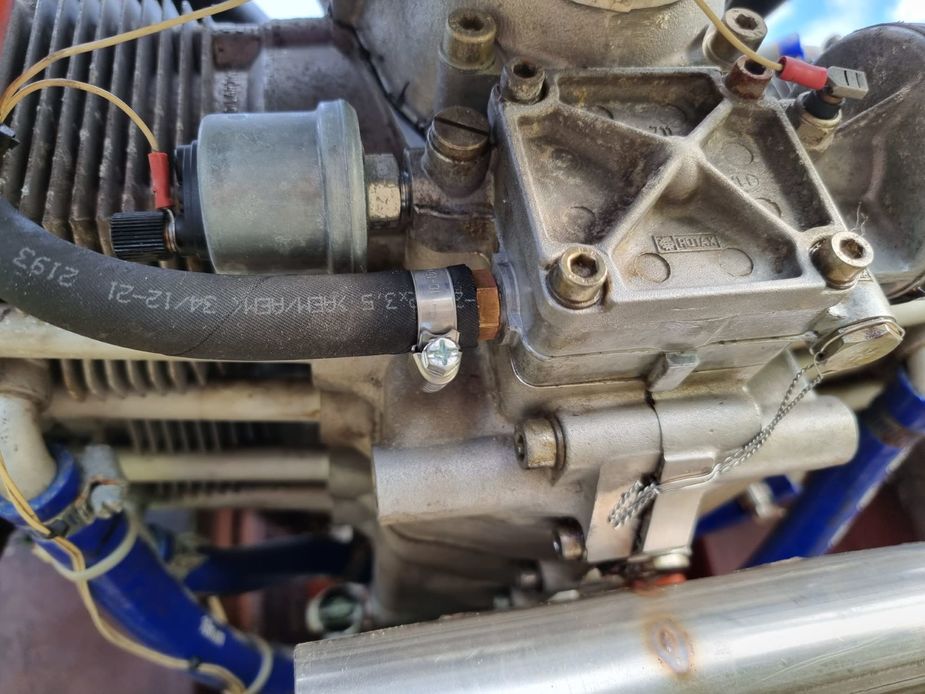
The hoses are being replaced in due course, but this has solved the leak for the time being.
All the spark plugs were clean on removal, except the ones from cylinder 4 which had some corrosion. I’m not particularly concerned about this as the Rotaxes have nikasil lined cylinders so they are much more resilient than big bore types with steel liners. That said, we will be borescoping the cylinders before any flying occurs.
With the plugs replaced for new and the oil system purged, it was time to start it. No problems here, it started easily with a bit of choke and ran extremely smoothly.
Knowing that the engine is happy, it was time to start replacing hoses. The hoses in this are a mess, so everything squidgy will be replaced.
The fuel hoses are a known pain in the arse on these. Another issue is the fuel tank itself, these are known to sag and split and the only way to replace them involves cutting part of the fibreglass structure out. This one is sound, for now, but it’s definitely a future concern. There is also a long filler tube which runs from the filler cap behind the cockpit into the tank – this was originally rubber and should be replace by an aluminium pipe, which we were pleased to find has already been done on this plane.
This is one of the areas of this design which is really poor IMO. Europa should have just had aluminium hard lines made in the first place, it wouldn’t have cost much and would have saved the need to replace the rubber hoses every few years.
Anyway, here’s the fuel system. Luckily the fuel system on this plane was almost completely standard. This diagram doesn’t show the fuel pump.
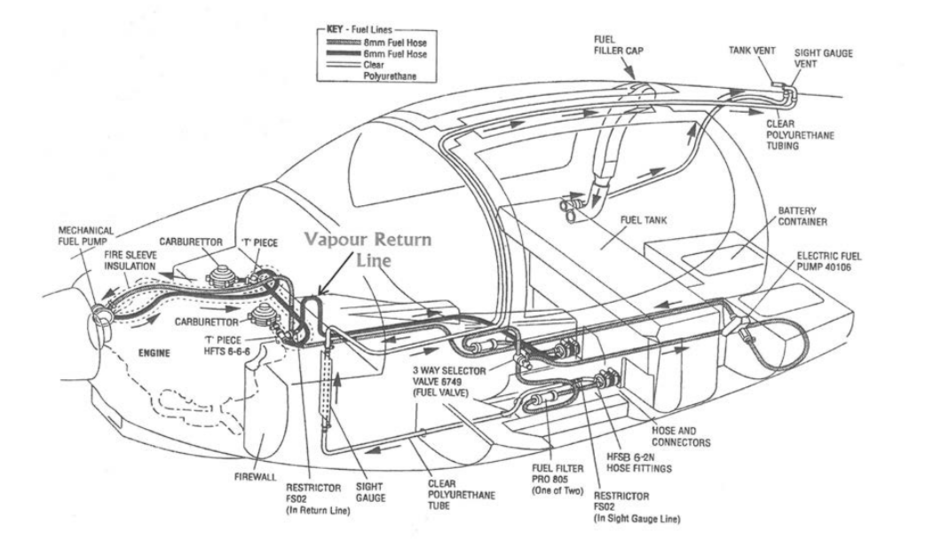
The problematic part is the hose connections directly to the tank. So far I’ve not tackled those, but the firewall forward lines and the feed/return lines from the fuel selector have been replaced. Another unpleasant feature is the fuel selector – the Europa has a hump in the middle of the tank which provides two separate sumps with two fuel feeds. These are labelled as “main” and “reserve” on the selector, and the selector was a horrible thing down on the floor, accessed by a hatch on the centre console. This is being replace by an Andair selector which will be mounted up on the console.
Before and after:
We were quite picky about the fuel hose. The best stuff is Gates Barricade but this seems mostly unobtainable in the UK. I settled for Cohline 2240 hose which is R9 spec and low permeability, so it shouldn’t smell like the cheaper stuff does.
Last job before we packed up for the weekend was washing the years of dust off the plane. The paint is surprisingly good.
That’s it for now, next will be continuing the obvious stuff such as hoses and dismantling/inspecting/greasing controls and gear.
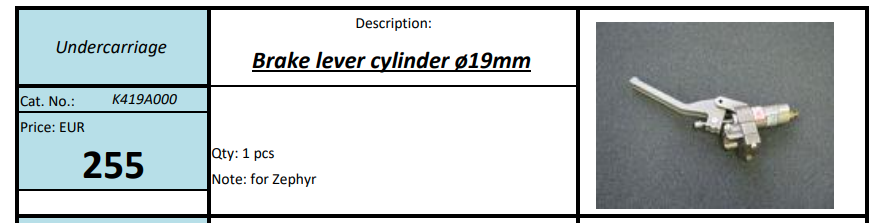
Another aspect of this project is some adaptions are required for the owner/pilot, who has one hand. This will consist of a hand brake on the joystick and a left hand throttle.
The throttle will be achieved using an off the shelf plunger throttle to replace the lever on the centre console, which will likely go into the panel where the ignition switch is currently. For the hand brake, I plan to use a motorcycle master cylinder/brake lever mounted to the stick.
IO390 wrote:
For the hand brake, I plan to use a motorcycle master cylinder/brake lever mounted to the stick.
On the Atec’s the brakes are handbrakes, at least in the original ones. These have a push button for parking brake function. I don’t know who makes them, could be Atec, but I would rather imagine it’s fairly standard glider stuff? Atec sells them with 16 and 19 mm stick fit (I guess)
I’d recommend replacing the thin rubber slide diaphragms on the Bing carbs. These do not last forever and I think after a 3-4 year period of inactivity there is a greater likelyhood that one will crack. If it does, you’re running on two cylinders.
I have a motorcycle with the same carbs and replace the diaphragms occasionally for the same reason. I have had one fail on the road. It only takes a few minutes.
Also the carb mounting spigot rubbers if they look at all rough.
This is fascinating
Thank you for taking the time to write it up
Silvaire wrote:
I’d recommend replacing the thin rubber slide diaphragms on the Bing carbs.
Carb rebuild kits ordered.